Take Control of Your Camera – Use Manual Mode!

Manual Mode seems intimidating to amateur photographers and is often passed over in favor of Auto-Mode, but if you’re looking to take full control of your camera and get perfectly exposed, high-quality images, you need to learn how to make images in Manual Mode! Manual Mode lets YOU set the aperture, shutter speed, and ISO (known as the exposure triangle) which enables you to produce the exact result you’ve envisioned.
Here are 10 great tips to help you master the Manual Mode and get more (and better images) out of your camera!
- While the aperture or shutter speed are usually uppermost in a photographer’s mind when shooting in Manual Mode, ISO is an important setting you shouldn’t ignore. It works differently than ISO on a film camera. It controls the brightness or darkness of your photo. When you have a lot of available light, use a low ISO and in low light use a higher ISO to brighten the image. You should only raise your ISO when you are unable to brighten the photo via shutter speed or aperture instead (for example, if using a longer shutter speed would cause your subject to be blurry)
- The higher your ISO is, the more ‘noise’ or grainy your photos will be. If you have to push your ISO up higher to achieve a perfectly exposed image, you’re not doing anything wrong! Some photographers love grainy black and white or color images, but it’s not everyone’s style. You can also remove most if not all of that “digital noise” in post-processing, so don’t be (as) concerned about using a higher ISO.
- WB or White Balance is used to get the right color temperature in your images, so that whites appear white. Different types of light can create color casts on white objects or skin tones in images and white balance is a great tool for correcting this. For example, fluorescent lights can make white sheets appear greenish. Tungsten lights (like a table lamp) can make subjects appear very orange or yellow. Cameras have many settings for White Balance, but learning to use custom white balance is something that can rock your digital photography world.
- Aperture (or f-stop) controls how much light is allowed through your lens by setting the f-stop. There are overlapping blades inside your lens that open and close to let light in depending on the f-stop selected. A lower f-stop (like f/2.8) will open the blades to let in a lot of light and a higher f-stop (like f/16) will close the blades to let in less light. Aperture also controls bokeh (that beautiful background blur) and lower apertures can create beautiful bokeh.
- Shutter speed controls how long the image sensor is exposed to light. Higher shutter speeds prevent motion blur and freeze motion, but let in less light because the shutter is not open as long. A lower shutter speed will let in more light, but may give your subjects motion blur if they are moving in the photo because the shutter is open longer.
- You don’t need to use Manual Focus to photograph in Manual Mode. Manual mode is all about learning to have control over the exposure settings on your camera instead of letting them control you. Many photographers use Auto Focus with Manual Mode, unless they are shooting at night, since most cameras have problems with finding a focus point in the dark. If you want to use Manual Focus while using Manual Mode, it will entail a few extra seconds to use the focusing ring on your lens in order to capture a sharp image.
- Shooting in RAW mode instead of JPEG will help Manual Mode photographers in the event that they don’t nail the exposure or white balance. A RAW image file holds all of the data that your camera captured and can be easily adjusted later in post-processing.
- Practice! Photographing in Manual Mode is challenging, but it will force you to learn your camera inside and out and you’ll be a better photographer for it. As with most concepts in photography, it takes practice so don’t expect everything to come naturally the first time out, and you won’t get things right in every image. There will be lots of over exposed and underexposed shots while you’re learning to photograph in Manual Mode and how to master the settings. Image too dark? Slow down the shutter! Image too bright? Speed up the shutter!
- Do some test shots – experiment with different settings! Your camera records its settings in the image file so you don’t have to write them down separately, as you had to do with a film camera. You can test various settings and see the difference in using Manual Mode by reviewing your images and the Meta Data for the image to see what settings were used to achieve a certain look or effect.
- It’s okay to ask for help! WPS has a wide range of safaris and we regularly encourage safarians to “get off auto mode”! (There are plenty of resources on the web, too!)
In closing, learning to photograph in Manual Mode will provide unlimited creative opportunities and also enables you to become intimately familiar with the abilities (or lack of abilities!) of your digital camera.
If you are “game” to try creating images in Manual Mode, send them to us! We’d love to see them!
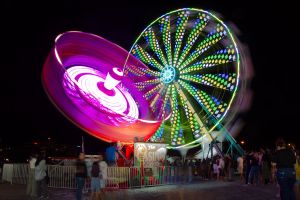
Photo by Sherryl Belinsky (F-stop: F/11, Shutter speed: 1 sec., ISO: 160)
