Tips for Photographing Snow
Although Winter officially starts on December 21, Meteorological Winter starts on December 1! According to the Old Farmer’s Almanac, because of El Niño – the natural warming of ocean water in the Pacific, which affects the Jet Stream and how much cold air comes down from Canada – the DC area should expect to see some snow by the end of the year (2023). So that you are prepared, here are a series of tips for photographing snow.

American Flag at the Three Servicemen Statue, National Mall, Washington, DC
- Use a Zoom lens to provide a range of focal lengths without having to change lenses in the cold.
- It is recommended to shoot your snow photos in RAW because it captures the most detail (read as pixels) in your image. That will allow you the greatest flexibility to adjust the White Balance, levels and exposure in post-processing.
- Using Manual Mode gives full control over the camera settings but you can also use Aperture Priority which allows you to control the depth of field, and the camera selects the shutter speed. Aperture Priority may be preferable, since there are fewer settings to adjust in the cold. If you want to photograph falling snow, you will need to use manual mode so that you can control the shutter speed to capture individual snowflakes or the movement of the snow as it falls.
- If using Aperture Priority, use exposure compensation (+1 or +2 stops) to help balance the blue or gray and keep the snow white. The images might be slightly overexposed, but that can be corrected in post-processing.
- Learn how to read your Histogram to ensure that you have a properly exposed image. The Histogram will display the dynamic range of tones. Relying on the LCD screen might limit how well you see the images since you can set the brightness of the screen.
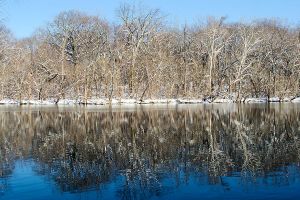
Roosevelt Island, Washington, DC
- All cameras are “programmed” to adjust the white in an image to an average of 18% gray, so the White Balance will need to be adjusted. Snow has a bluish tone when it’s not illuminated by the sun, which is due to the snow reflecting the blue sky. Set the White Balance to Shade or create a white balance preset from the snow (refer to your camera manual for the process if you are not familiar with it).
- You can also set the White Balance manually by adjusting the Kelvin Scale to 6500k and making small adjustments to the scale as necessary. (When using the Kelvin Scale, keep the following in mind: the higher the number, the colder or more blue in the image – conversely, the lower the number the warmer and more red in the image.)
- Use a Polarizing Filter to reduce reflections on bright surfaces – especially snow in the sun! It can also be used to darken a bright sky or increase the saturation of colors in the image.
- Use a Lens Hood to limit lens flares, not to mention to protect the glass from condensation and the snow.

Restored Lockkeeper’s House at 17th Street & Constitution Ave, Washington, DC
- Keep microfiber cloths handy to wipe down condensation.
- Put your extra battery in an interior pocket so that it stays warm and keeps a full charge, since the cold will reduce the charge capacity.
- Make sure to have a zip-top bag with you to put your camera in before returning to a warm interior. Remove the memory card, then place the camera and lens in the bag to protect it from condensation, which will form on the outside of the bag instead of on (or in) your camera and lens.
- Last, dress warmly!